Healthy Meals
-
Tasty Tilapia
Hey Everybody!
Today’s recipe is one for tasty tilapia. I love this recipe because it is so easy to make. It’s one that I came up with on my own, after trying many recipes that I didn’t like. This recipe makes about four servings.
This recipe generally takes only about 20 minutes from start to finish.
Ingredients
4 Filets of Tilapia (I like to use Costco’s pre-packaged filets)
1 Egg
¼ Cup of Grated Parmesan Cheese
1 Tsp. Oregano
½ Tsp. Garlic Powder
1 Tbsp. Lemon Juice
1½ Cups of Minute Brown Rice
1½ Cups of Water
1 Can of Del Monte French Cut Sea Salt Green Beans
Instructions
- Preheat oven to 425⸰F.
- Start boiling your water in a pan.
- In a rectangle shaped container, whisk your egg (if it doesn’t whisk well, add a little bit of water).
- In a separate rectangle shaped container, mix your parmesan cheese, oregano, and garlic powder.
- When the water starts to boil add your rice, stir, put your lid on top, and remove from heat. (You want to do this near the beginning as brown rice takes longer to soak up the water).
- Now you want to get your baking sheet ready, I like to line mine with tin foil for easy clean up.
- Next, we will batter our fish. Take a filet, dip it in the whisked egg, dip it in the parmesan cheese mixture, then set it on the baking sheet. Repeat for other four.
- Once your oven is preheated, you can put your fish in. Cook for 10-12 minutes. (Check that the internal temperature has reached 145⸰F, I will insert the thermometer I use below.)
- Now heat your beans in a separate pan on medium low.
- When the fish is done, everything else should be as well. I add a little bit of lemon juice to garnish both my fish and my rice. I also sometimes add a little spray butter to my rice and beans. Enjoy!
I really enjoy this recipe and I hope you do too. Let me know what you think about this recipe in the comments below. If you love this please subscribe as well!

[email-subscribers-form id=”1″]
-
Benefits of Eating Yogurt
Hey Everyone!
Today I am talking about the benefits of eating yogurt. I know that a lot of you probably already know that eating it is very good for you, but you might not know all of the benefits. I am also going to talk about my favorite type. I think it tastes like a treat!
The first benefit I am going to talk about is that yogurt supports healthy digestion. Yogurt has something called probiotics in it. Probiotics are healthy bacteria. This might sound disgusting to you but we actually have a ton of bacteria normally in our gut. When the good and bad bacteria get out of balance, more bad than good, it can cause you to become sick. When you add probiotics to the mix you are adding more good bacteria, which is exactly what we want. Yogurt can boost the immune system. This also stems from the probiotics. It can help regulate your mood. Studies have shown that good gut health is directly related to better mood. It lowers the risk of many diseases. Some of these diseases include: Diabetes II and Colorectal Cancer. Due to the probiotics in the yogurt, your gut stays healthier for longer. As a byproduct, your risk of colorectal cancer is decreased. This has been proven in medical studies. Since yogurt promotes a healthy gut, it also improves the absorption of nutrients in the gut. This can improve blood sugar regulation, which in turn, can prevent Diabetes II. It prevents osteoporosis and can increase bone density. This is because it has both calcium and vitamin D, which are crucial for bone health! Both of these vitamins strengthen and maintain your bone mass.
My favorite yogurt is Noosa. My favorite flavor is lemon. You can find this at most grocery stores and they also sell it at Costco!

I hope that you learned something from today’s post. Please let me know in the comments below! Thanks for reading.

[email-subscribers-form id=”1″]
-
Perfect Pesto Pasta
Hey Everybody!
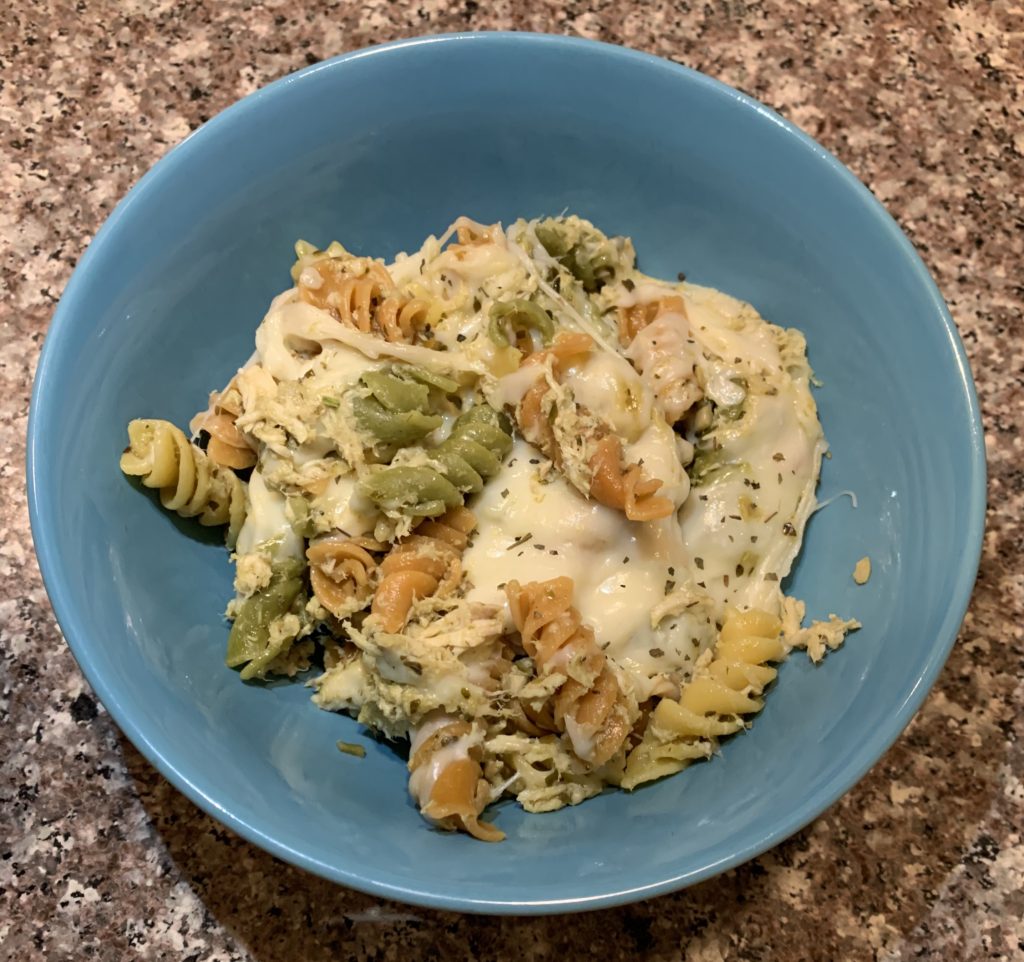
Today’s recipe is one for a crockpot pesto chicken pasta. Shane and I have been really interested in finding meals that we can prepare in the morning and eat pretty soon after we get home from skiing. We are always exhausted and the last thing we want to do is cook. I originally got this recipe from Pinterest from themagicalslowcooker.com by Sarah Olson. I have made a few modifications as I wanted to make it a little healthier!
This recipe generally takes about 5 hours and 15 minutes from start to finish. Although you can cook the chicken longer if you are not home during that time frame! This recipe is for 8 servings so plan accordingly. Shane and I usually half the recipe!
Ingredients
1½ lbs. Chicken Breasts
½ tsp. Salt
¼ tsp. Pepper
1 jar (6 oz.) Pesto (I used Barilla Rustic Pesto)
¼ cup Salted Butter
2 Tbsp Lemon Juice
1 box Veggie Rotini (I use Ronzoni)
½ cup Parmesan Cheese
1/2 cup Lowfat Shredded Mozzarella Cheese
¼ tsp. Dried Basil
Instructions
- Add
liner to your crockpot. This will make cleaning up 10X easier! - Add the chicken to the crockpot. Sprinkle with the salt and pepper. Spread over the pesto, pour the lemon juice over the chicken. Cut the butter into slices and lay over the chicken.
- Cover and cook on low for 5-6 hours without opening the lid during the cooking time. *We have cooked ours up to 10 hours like this and it still tasted fine!
- Near the end of the cooking time, cook the pasta according to the package directions and drain well.
- Shred the chicken by taking it out of your crockpot and putting it into your KitchenAid. Use the flat beater attachment, lock the KitchenAid and turn it on 3 for 30 seconds. This should shred your chicken evenly. Add the chicken back into the crockpot. (You can also shred your chicken with forks, I just prefer to use my KitchenAid because it is easier!)
- Add the cooked pasta and the parmesan cheese to the crockpot, stir everything until the pasta is coated with the buttery pesto sauce and the chicken is evenly dispersed throughout the pasta. Add the mozzarella cheese over the pasta. Cover for about 15 more minutes or until the cheese has melted.
- Garnish with dried basil. Serve and enjoy!
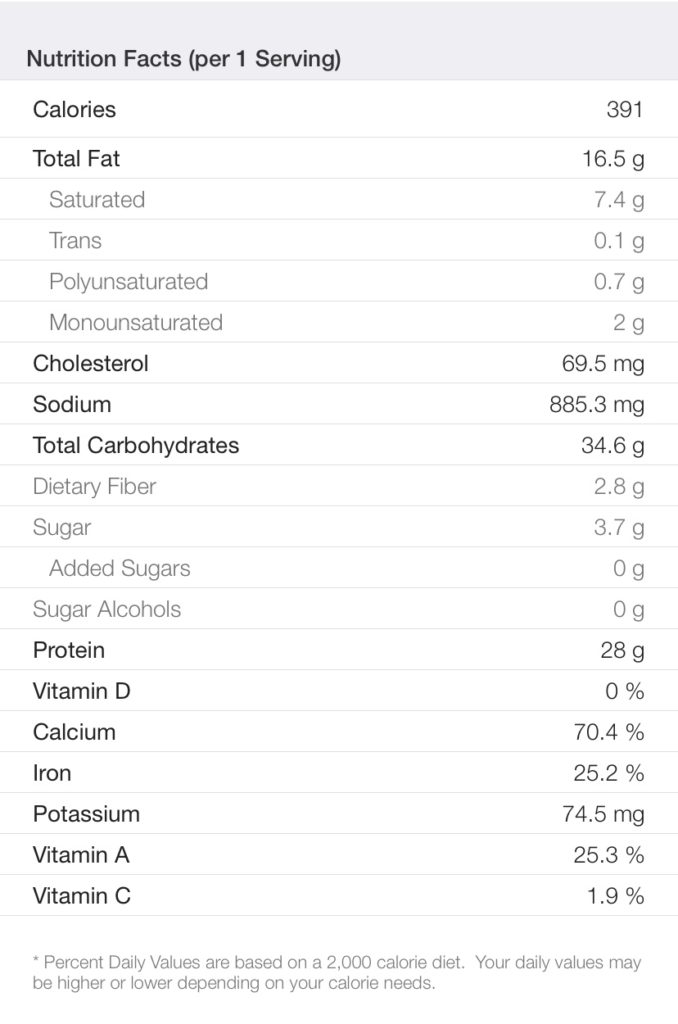
I really enjoy this recipe and I hope you do too. It is perfect, heated up for leftovers as well! Let me know what you think about this recipe in the comments below. If you love this please subscribe as well!

[email-subscribers-form id=”1″]
- Add
-
Flavorful Fajitas
Hey Everybody!
Today’s recipe is one for flavorful fajitas. I love this recipe because it is so easy to make. I got this recipe mostly from the back of a McCormick’s mix packet but I have altered it a little to make it a little healthier.
This recipe generally takes only about 20 minutes from start to finish.
Ingredients
1 lb. Ground Beef
1 pkg. McCormick Fajita Seasoning Mix
1 Large Onion (diced)
1 Green Bell Pepper (sliced into small pieces)
¼ Cup of Water
4 Tortillas (I use Mission Whole Wheat Chia & Quinoa)
1 Container of Pico De Gallo (We love Salsa Queen)
¼ Cup of Shredded Cheddar Cheese
¼ Cup of Low Fat Plain Greek Yogurt
Instructions
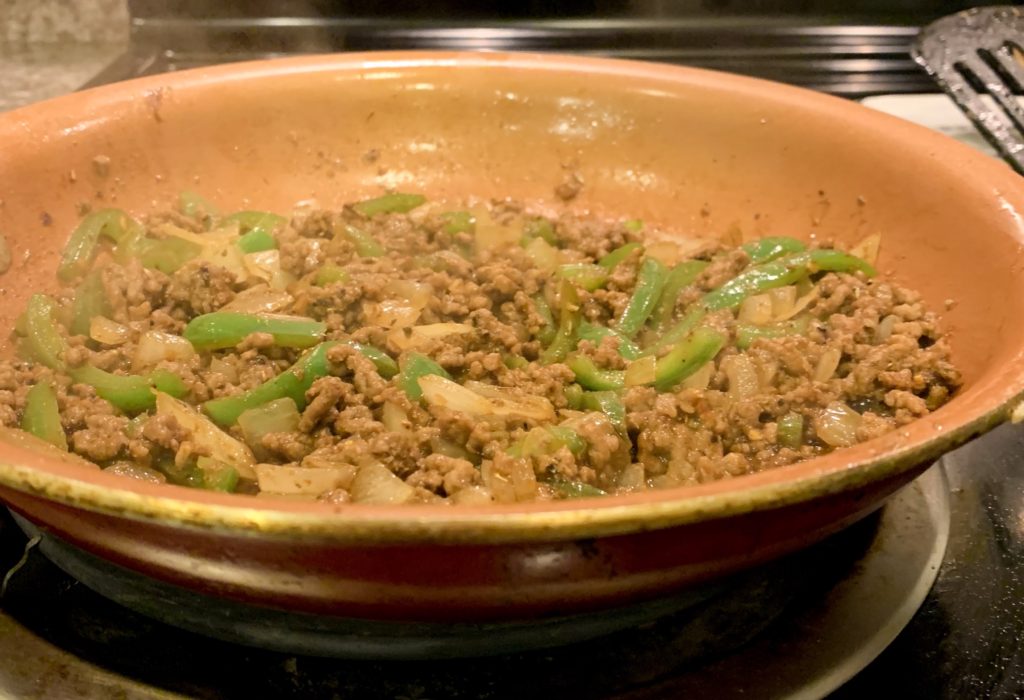
- Heat up your frying pan on medium-high heat. (I love my copper pan that is nonstick, I will insert the one I use below)
- Add meat, cook and stir for about 3-5 minutes, until the meat is no longer pink.
- Remove meat and put it into a bowl with a paper towel under the meat. (This will soak up the grease)
- Dispose of the remaining grease in the pan.
- Return the pan to the heat and add your onions and green peppers. Cook and stir for about 3-5 minutes then return the meat to the pan.
- Stir in your water and seasoning mix. Cook and stir for 3 more minutes.
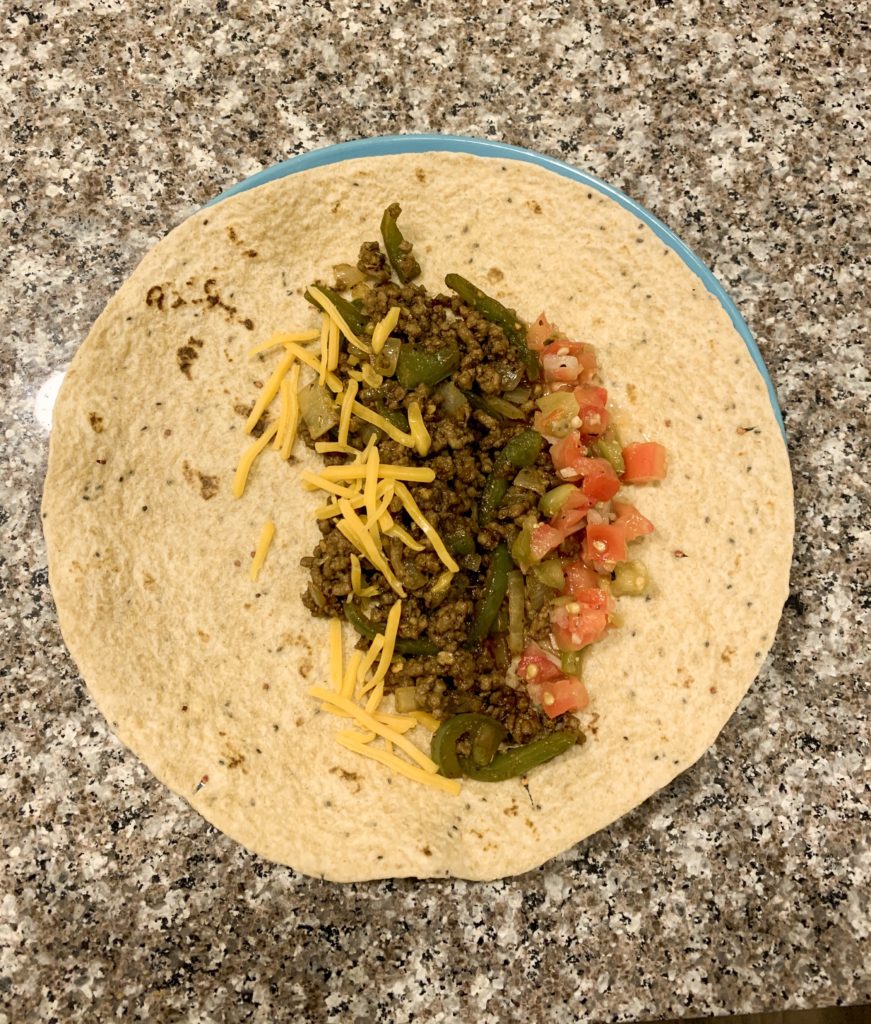
- Add mixture to tortillas, along with a sprinkle of cheese, a tablespoon of Greek yogurt and a tablespoon of Pico De Gallo.
- Enjoy!
I really enjoy this recipe and I hope you do too. Let me know what you think about this recipe in the comments below. If you love this please subscribe as well!

[email-subscribers-form id=”1″]
*Disclaimer: I am paid a commission from Amazon if you use my link.
-
Savory Orange Chicken and Broccoli
Hey Everybody!
Today’s recipe is one for orange chicken and broccoli. I honestly think that it’s better than Panda Express. This isn’t as healthy as some of the other recipes I have posted, but it is one of my favorite go to meals. This is actually my own original recipe as well.
This recipe generally takes about 30 minutes from start to finish.
Ingredients
2 Boneless Skinless Chicken Breasts
1 Cup Panko (found on the Asian Isle)
1 Teaspoon Dried Parsley
1 Egg
2 Tablespoon of Orange Sauce (found on the Asian Isle)
2 Crowns of Broccoli
1 Cup of Minute Jasmine Rice
Instructions
- Preheat the oven to 400 degrees F. Line a large sheet pan with parchment paper and set aside.
- Grab two bowls. Add the panko and parsley to one bowl and crack the egg into the second. Beat the egg so that it is an even consistency.
- Slice chicken breasts into small cubes about ¾ inch by ¾ inch.
- Dredge your chicken in the egg, then in the panko and parsley mixture.
- Place on prepared sheet pan.
- Bake in preheated oven for 10 minutes and remove.
- Flip the pieces of chicken to the other side.
- Return to the oven and bake for another 10-12 minutes or until the internal temperature of the chicken has reached 165 degrees F.
- At this point start to prepare your broccoli. Cut your broccoli crowns into small bushels. Fill a medium saucepan about 1/3 with water and boil it on high. Once it starts to boil place a steamer into your pan with the cut broccoli. Cover and reduce heat to medium for 9-11 minutes.
- Meanwhile, boil 1 cup of water in a small saucepan. When it starts to boil pour 1 cup of minute jasmine rice in the pan and stir. Cover and remove from heat.
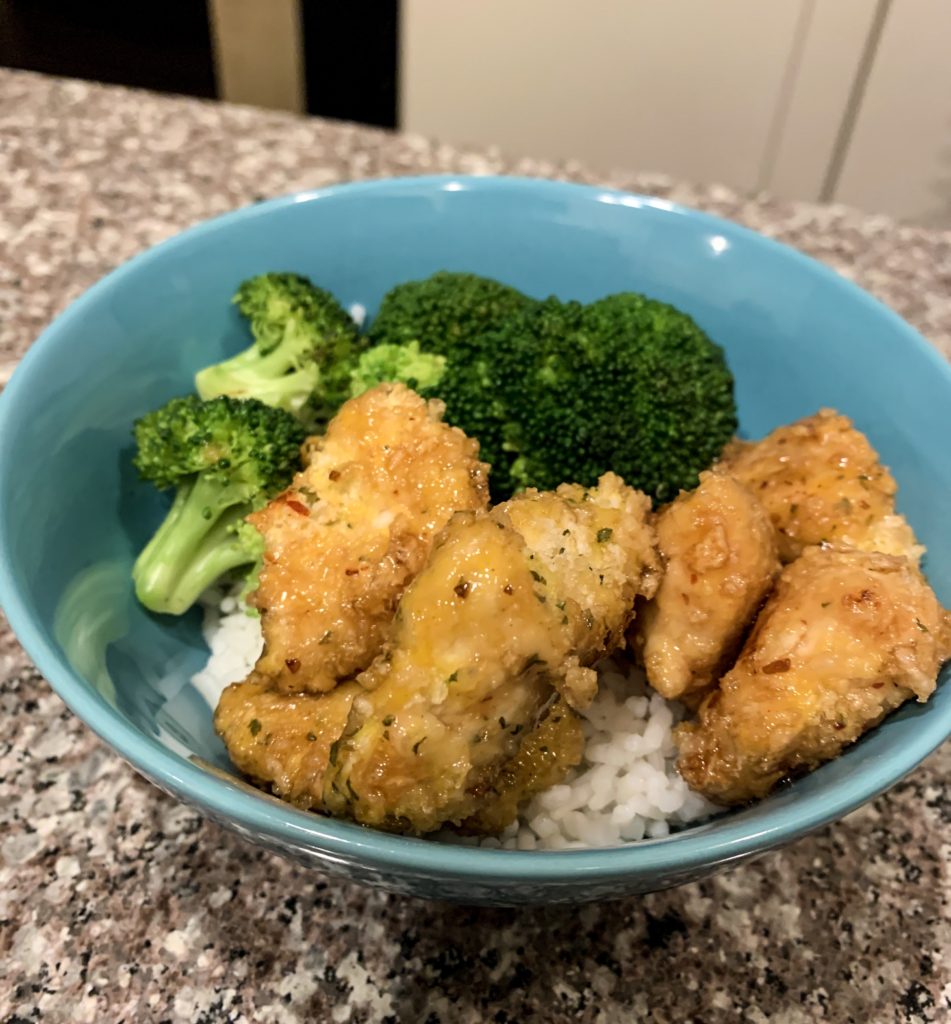
- Top the cooling chicken with orange sauce and enjoy immediately.
- Do not top chicken breasts with the orange sauce unless you are eating immediately and aren’t planning on having leftovers since it will make them soggy.
I really enjoy this recipe and I hope you do too. Let me know what you think about this recipe in the comments below. If you love this please subscribe as well! You have got to try this one out. You will not be disappointed.

[email-subscribers-form id=”1″]
-
Scrumptious Salad
Hi Everyone!
Today’s post is about my favorite salad of all time. This is my go-to salad! It reminds me of the Chipotle Glazed Pork Salad from Zuppas. The ingredients are listed below for one serving of salad.
Ingredients
1/3 Head Green Leaf Lettuce
1/6 Package Pork Carnitas
¼ Can Sweet Corn
¼ Can Pinto Beans
8 Croutons
1/8 Red Onion
10 Cherry Tomatoes
¼ Avocado
1 Tablespoon Chipotle Ranch
1 Tablespoon Barbeque Sauce
1/8 Cup Cheddar Cheese
Directions
- Heat up the meat in the microwave according to the directions on the box.
- Get two pans out and start heating your sweet corn and pinto beans on medium-low.
- When the meat is finished heating, remove from the packaging and place into the kitchen aid with 2 Tablespoons of Barbeque sauce, lock and mix at a three for one minute. If you do not have a kitchen aid, you can shred the meat and mix it with the sauce in a bowl.
- Next cut your head of lettuce.
- Next dice your red onion. (I keep a diced onion in a Ziploc baggie in my fridge).
- Next cut your cherry tomatoes in half.
- Next dice your avocado.
- Add the above amounts of ingredients into a large bowl and toss.
- When finished, drizzle your remaining barbeque sauce and chipotle ranch over the mixture.
- Enjoy!!
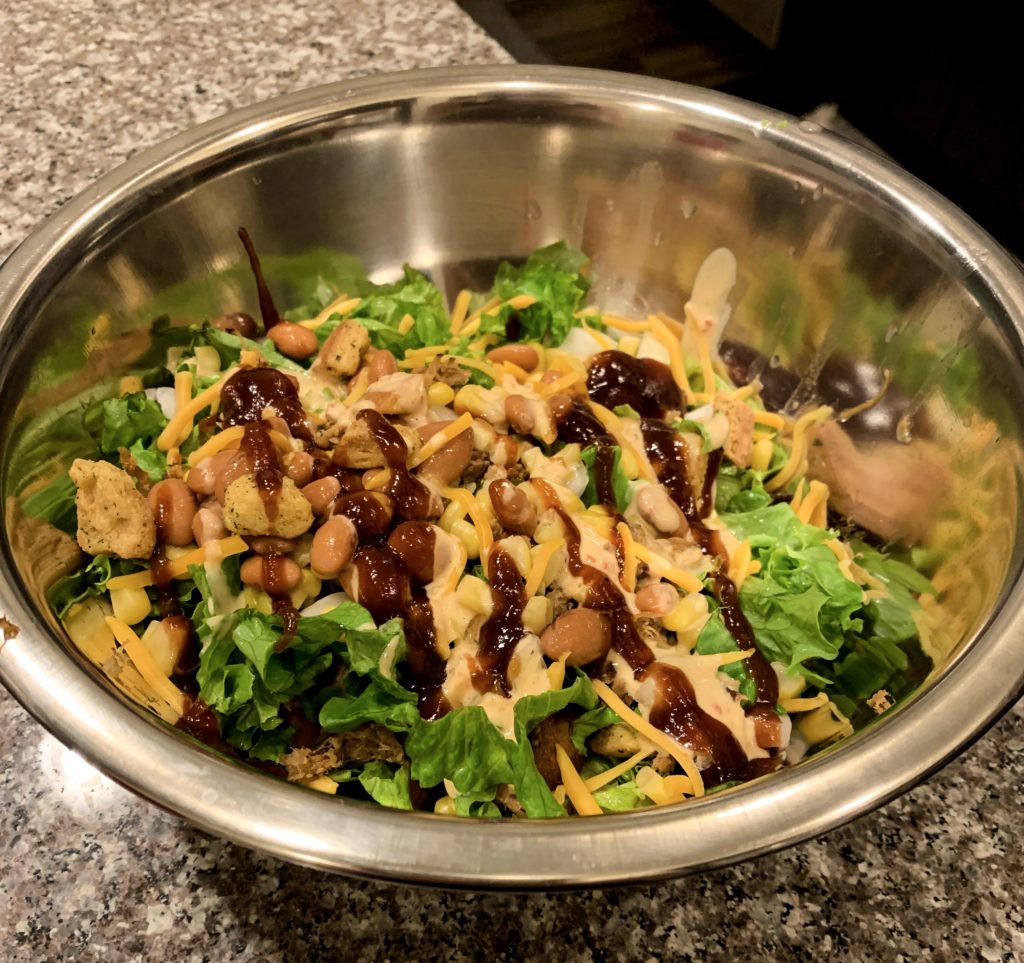
I am obsessed with this salad. If you ask anyone who knows me well if I’ve always loved salads, they will tell you definitely not. I just recently got into eating salads within the last two years. I could seriously eat this one every day if I could!
Let me know what you think about this recipe in the comments below!! Subscribe to see all of the yummy recipes I post!

[email-subscribers-form id=”1″]
-
Smart Spaghetti
Hey Everybody!
Today’s meal is a healthy version of spaghetti. It is one of my easiest meals that I make and it is also Shane’s favorite, so it’s a go to for us. We eat this at least once a week.
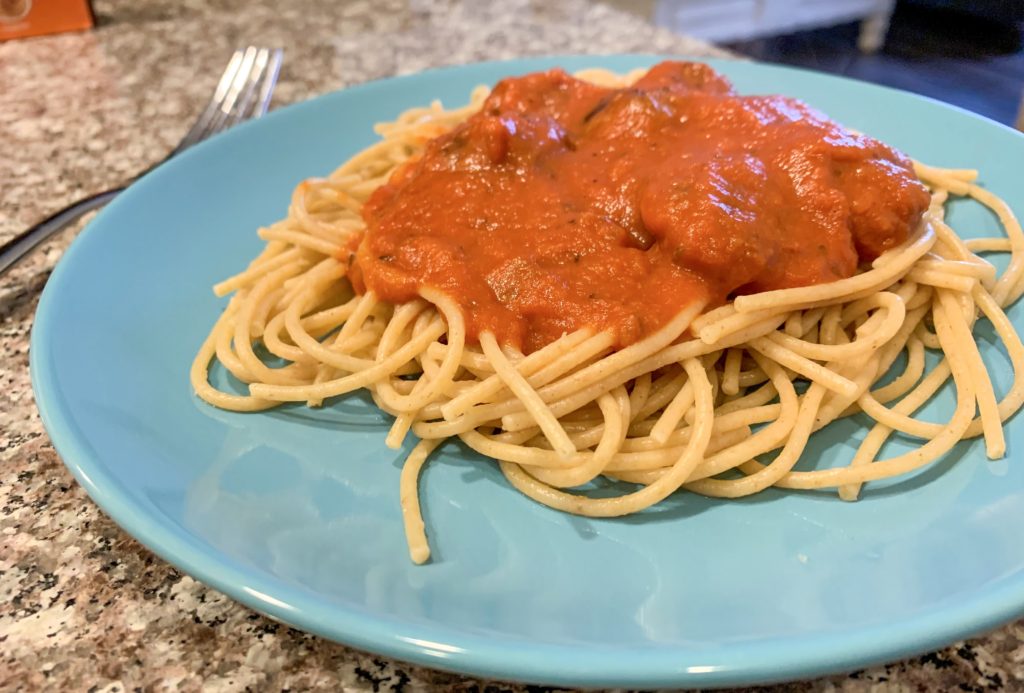
Ingredients
½ Box of Ronzoni 100% Whole Grain Spaghetti Noodles
1 Jar of Kroger Parmesan & Romano Pasta Sauce
2 Italian Sausages (I like Mild)
Recipe
1. Heat up a frying pan on medium heat and another medium saucepan halfway filled with water on high.
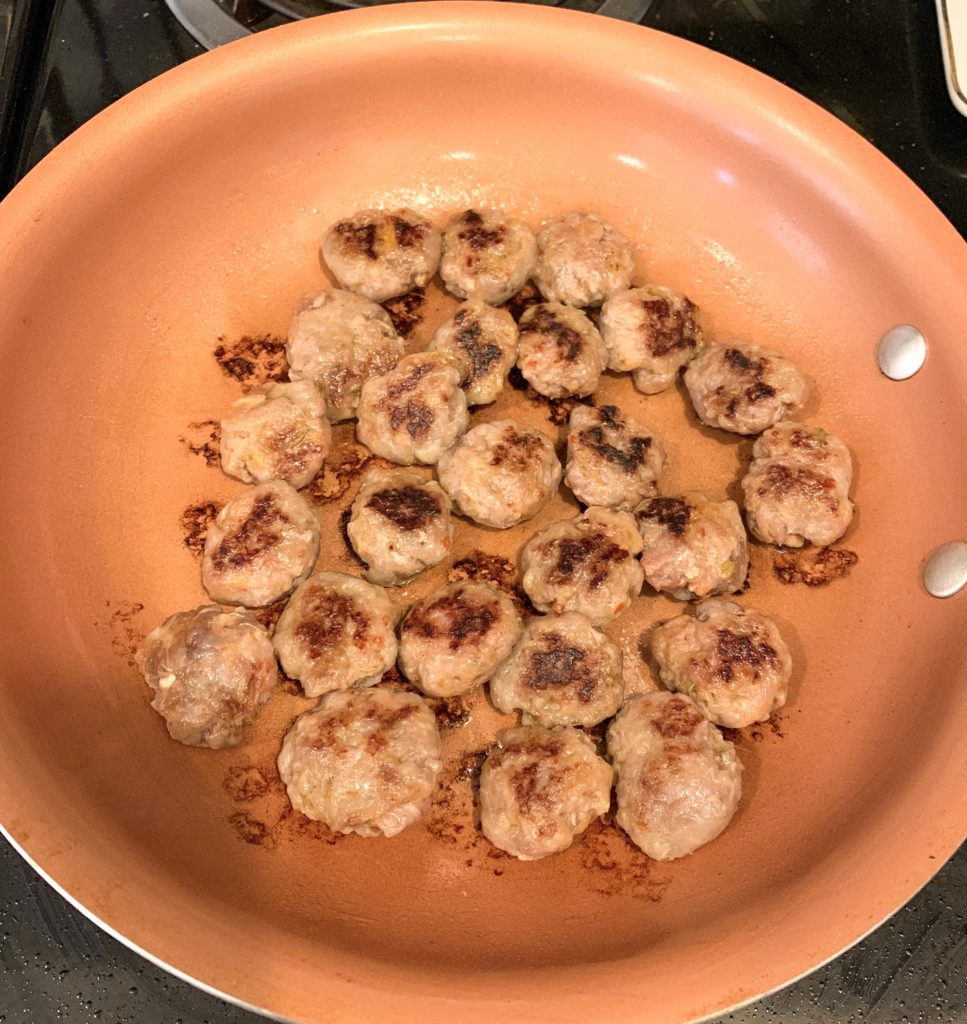
2. While these are heating, decase your Italian sausages and make them into small patties.
3. When you are finished, put them into the frying pan, so they are all laying flat next to each other.
4. The water should be boiling in the saucepan by now so add half of your package of noodles, by breaking them in half. Dash a small amount of salt into the water (to prevent sticky noodles).
5. Start the timer for 10 minutes. Stir your noodles occasionally throughout this time.
6. Your sausages should be about ready to flip over, flip one over with a fork to make sure it has cooked to your liking, then flip the rest.
7. Once all of your sausages are cooked on both sides, I put mine into a small bowl and set it aside.
8. Drain your grease from the frying pan and bring the pan back to the heat lowering it to medium-low.
9. Add your pasta sauce to the frying pan and stir occasionally.
10. Drain your noodles when the timer goes off.
11. Add your sausage back to the frying pan into the sauce.
12. Once your sauce has heated to your liking you are ready to eat.
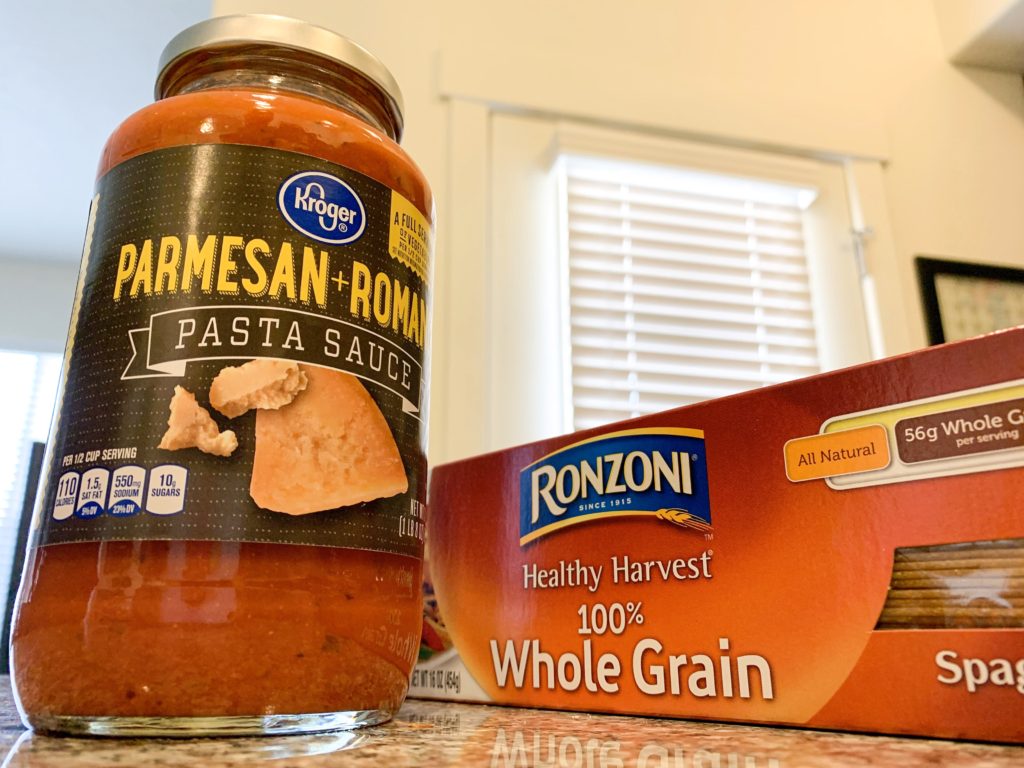
I absolutely love that this recipe only has three ingredients. It makes it very easy to prepare and to shop for. We also almost always have all of the ingredients on hand. I like to buy in bulk so that we have a little bit of a storage just in case. I also buy multiple packages of Italian sausage at the same time. When I get home I decase all of them and put them in freezer bags with two in each one. I just thaw them in the fridge each day we have this for dinner. It makes this meal very convenient.
Let me know what you think about this meal in the comments below. If you love this please subscribe as well!

[email-subscribers-form id=”1″]
-
Perfect Summer Snack
Hey Everybody!
Today’s recipe is one for dried strawberries. They are super easy to make and make a great, healthy snack. Healthy snacks are often hard to find or they go bad very quickly. These are one of my favorite summer snacks. They also work very well to curb your sugar cravings!
Ingredient
2 lb. Strawberries
Instructions
- Preheat oven to 200 degrees.
- Prepare a cookie sheet with tinfoil and parchment paper (the tinfoil underneath the parchment paper), using only one will make cleaning up difficult.
- Cut the strawberries into thin slices (about 1/8 inch) from the tip up to the stem.
- Place them on the parchment paper side by side, be careful not to push them together as you will be flipping them over halfway through baking them.
- Place the cookie sheet into the oven for two hours.
- Remove from the oven and let them sit for about fifteen minutes.
- Flip them all over and place back in the oven for an additional hour.
- Let them sit overnight to dry out a little bit more.
- Place them in a container or enjoy immediately.
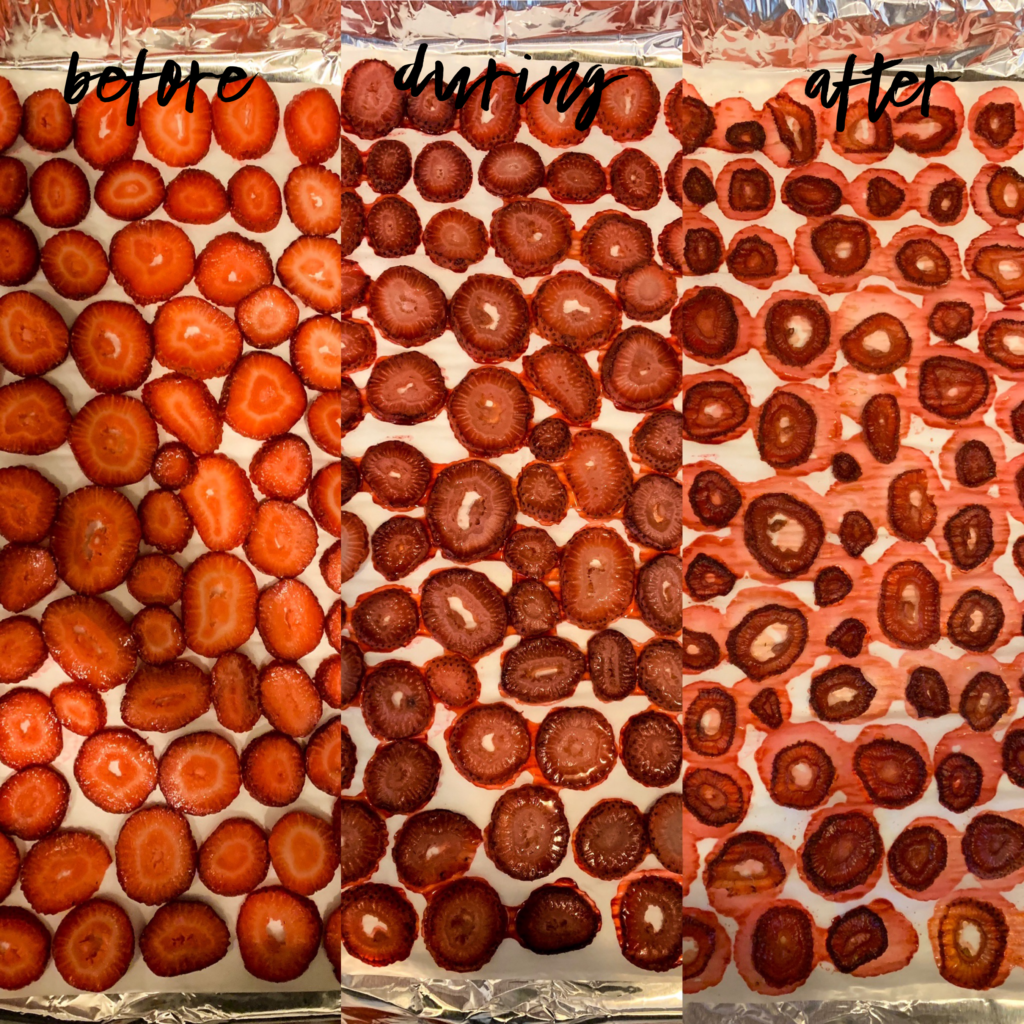
I have a few tips about this recipe that I have learned through making them several times. The thinner you can slice the strawberries the better. If your strawberries are starting to go bad in your fridge, they will work perfectly with this recipe. Without the tin foil, the strawberries make the cookie sheet very sticky and difficult to clean. Without the parchment paper, the strawberries stick to the tin foil and you cannot flip them very easily.
Let me know what you think about this recipe in the comments below. If you love this please subscribe as well!

[email-subscribers-form id=”1″]
-
Mouthwatering Lemon Parmesan Chicken and Asparagus
Hey Everybody!
Today’s recipe is one for mouthwatering lemon parmesan chicken and asparagus. I am not kidding you; my mouth is literally watering as I type this. This meal is so delicious, it leaves you constantly thinking about when you can have it next! As I have mentioned before, I am known to be a picky eater so getting those veggies in is so tough for me. I have learned to love asparagus because of this meal!
I got this recipe from one of my good friend’s Lars Sundwell.
He got the recipe from Chelsea’s Messy Apron, though they call it one pan lemon parmesan chicken and asparagus. I think that title is misleading as this uses many items in the kitchen in order to prepare. (Though it is well worth it every time)
This recipe generally takes about 40 minutes from start to finish.
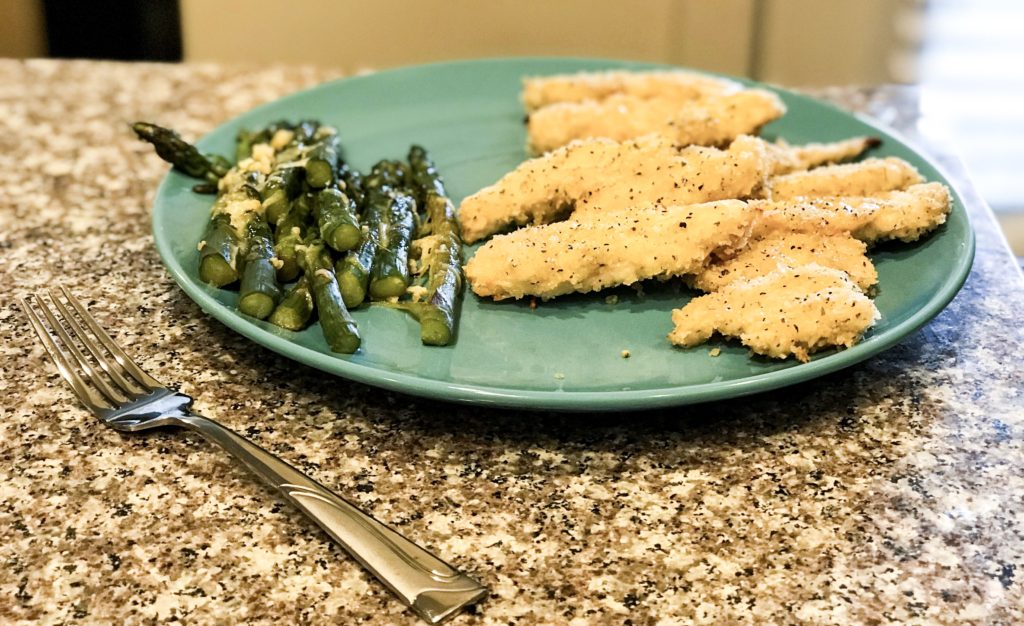
Ingredients
1 ½ pounds boneless skinless chicken breasts or tenders
1/3 cup flour
1 cup panko (found on the Asian Cooking Aisle)
1 cup parmesan cheese separated
1 teaspoon dried parsley
1/2 teaspoon garlic powder
3-4 lemons
1 tablespoon minced garlic
8 tablespoons melted butter separated
1 tablespoon lemon pepper seasoning
1 pound asparagus
3 tablespoons olive oil
3 tablespoons honey
Optional: fresh parsley, 1 lemon for topping
Instructions
- Preheat the oven to 400 degrees F. Line a large sheet pan with parchment paper and set aside.
- Grab three bowls. Add the flour to one bowl.
- Combine panko, 1/2 cup freshly grated parmesan cheese, dried parsley, garlic powder, about 1/2 teaspoon each of salt and pepper. Stir.
- In the final bowl, add 1-2 teaspoons lemon zest, 4-5 tablespoons lemon juice (depending on lemon flavor intensity desired), minced garlic, and 5 tablespoons melted butter. Stir. Remove 4 tablespoons of this mixture and set aside.
- Slice chicken breasts to the size of tenders (about 1 and 1/4th inch strips) or use chicken tenders.
- Coat in flour, heavily dredge in garlic lemon mixture, and then coat in the Parmesan panko mixture.
- Place on prepared sheet pan. Use any remaining Parmesan panko mixture and sprinkle over tenders. Sprinkle lemon pepper seasoning over the tenders (I use Mrs. Dash lemon pepper)
- Bake in preheated oven for 10 minutes and remove.
- Flip the tenders to the other side.
- Place the asparagus next to the tenders and drizzle the reserved lemon butter sauce. Sprinkle remaining 1/2 cup Parmesan cheese over the asparagus and toss with tongs.
- If desired place lemon slices over the chicken (optional)
- Return to the oven and bake for another 10-12 minutes or until the internal temperature of the chicken has reached 165 degrees F.
- Meanwhile, whisk remaining 3 tablespoons melted butter, 3 tablespoons lemon juice, 1-2 teaspoons lemon zest, 3 tablespoons olive oil, and 3 tablespoons honey in a small bowl. Add some pepper and parsley if desired.
- Remove from the oven and top with the honey lemon mixture and fresh parsley if desired and enjoy immediately.
- Do not top chicken breasts with the honey lemon mixture unless eating immediately and aren’t planning on having leftovers since it will make it soggy.
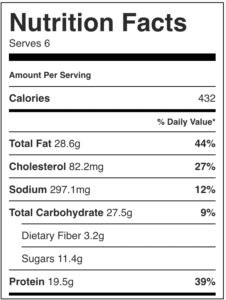
If you want to visit the original site go to: https://www.chelseasmessyapron.com/one-pan-lemon-parmesan-chicken-and-asparagus-video/
They even have a printable version of the recipe!
A few things that I have learned through making this recipe several times is that I like to steam my asparagus before baking it in the oven, if you forgot to get the lemons at the store it’s not the end of the world lemon juice works just fine, if you are cooking with your husband in the room make sure he knows that you set extra sauce to the side that you will be using (mine thought it was just another dirty dish and washed it down the drain lol).
Let me know what you think about this recipe in the comments below. If you love this please subscribe as well! You have got to try this one out. You will not be disappointed.

[email-subscribers-form id=”1″]
-
Delectable Zucchini Fries
Hey Everybody!
Today’s recipe is one for delectable baked zucchini fries. I unfortunately consider myself to be pretty picky so finding a way to get my vegetables in can be really hard. I have been working hard to find recipes that I love so that I eat all the servings I should be without gagging them down.
I found this recipe on Pinterest, which is my favorite place to find new ideas.
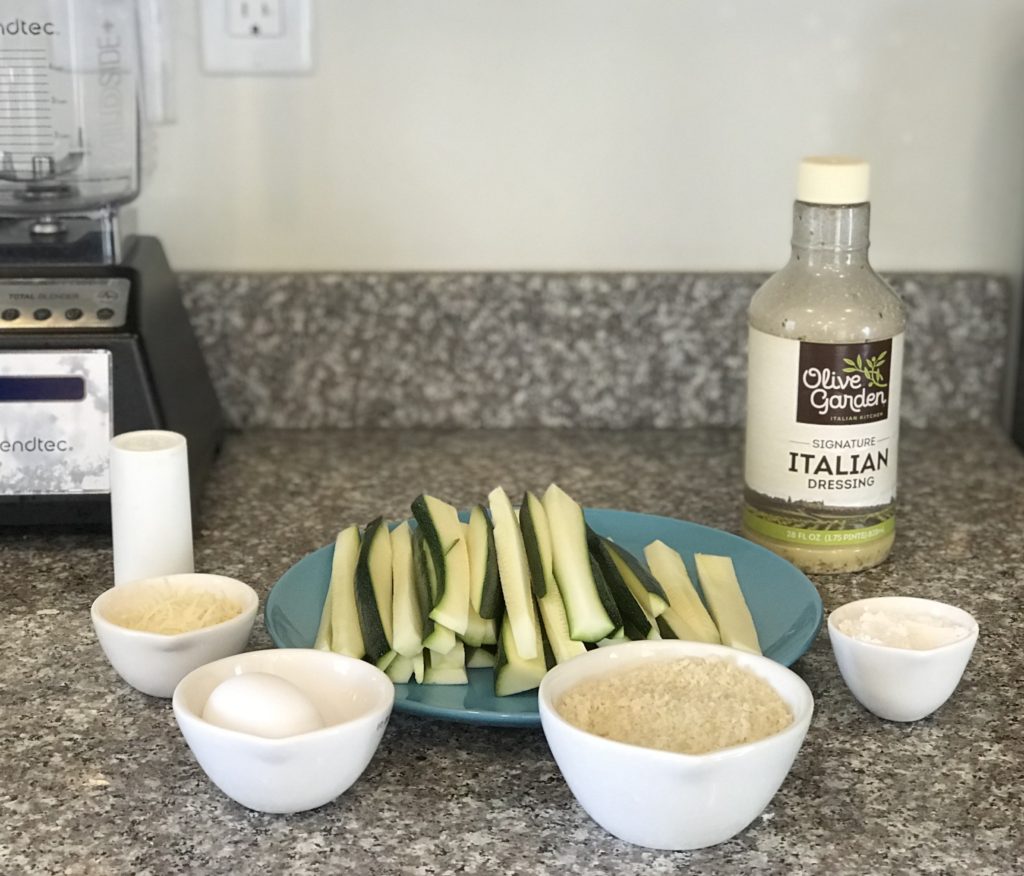
This recipe comes from budgetbytes.com:
Ingredients
1 lb. Zucchini Squash
1/4 cup All Purpose Flour
1/8 tsp. Salt
1 cup Panko Bread Crumbs
¼ cup Parmesan Cheese (Fresh or Grated)
1 Tbsp. Italian Seasoning Blend (I used Olive Garden actual dressing)
1 Large Egg
Instructions
- Preheat oven to 425 degrees.
- Rinse and dry the zucchini. Cut the ends off and then cut each one into strips, approximately 1/3 inch thick.
- Place the zucchini strips in a large
zip lock bag and add the flour and salt. Shake the bag to coat the zucchini in flour. In a wide, shallow bowl combine the panko bread crumbs, parmesan cheese, and Italian seasoning. Stir to combine. In a second, wide, shallow bowl, whisk a raw egg with about 1 Tbsp of water until fairly smooth. - Cover a baking sheet with foil and then place two wire cooling racks over top. One by one, take the flour coated zucchini strips and dip them in the egg and then the seasoned bread crumb mixture. Place the breaded zucchini on the wire cooling racks. The wire racks keep the zucchini up off of the baking sheet and
allows hot air to circulate underneath, which will prevent soggy bottoms.Also make sure there is a small amount of space between each strip to allow circulation. - Once all of the zucchini strips are breaded, bake them for approximately 15 minutes or until they are a medium golden brown color. Cooking time will vary with the thickness of your zucchini strips, so keep a close eye. I personally cooked mine for 25 minutes as I like mine pretty crispy.
If you want to visit the original site go
to: https://www.budgetbytes.com/baked-zucchini-fries/
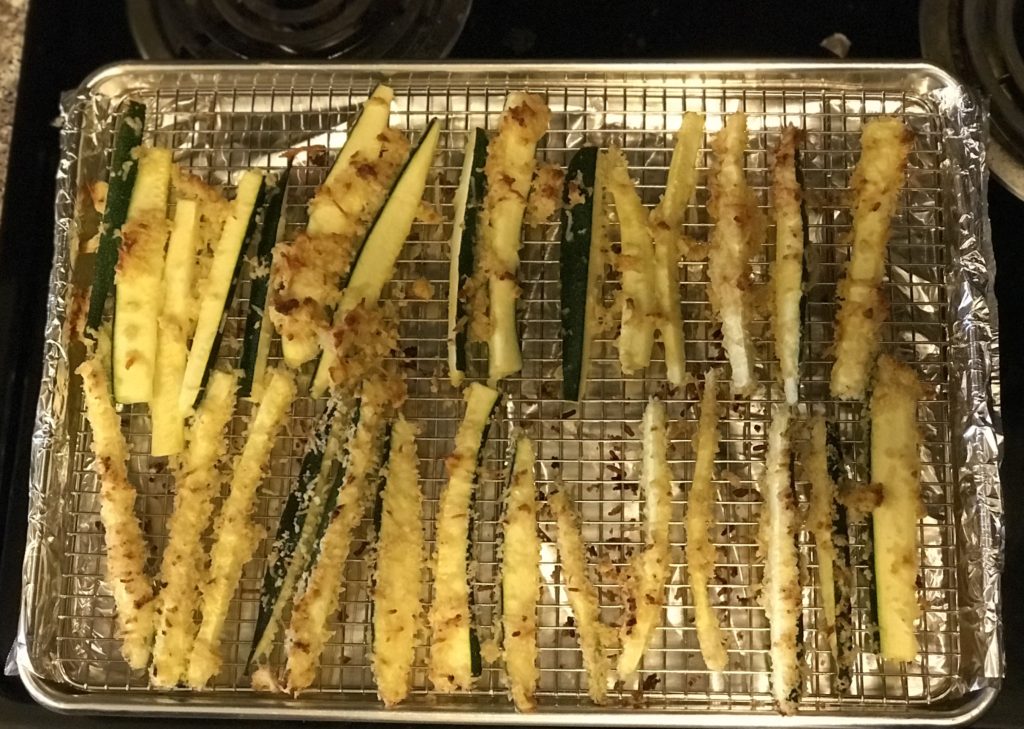
They even have a printable version of the recipe! This site has a ton of great recipes, I’m sure I’ll be sharing more of them with you guys in the future.
Let me know what you think about this recipe in the comments below. If you love this please subscribe as well!

[email-subscribers-form id=”1″]
